123.hp.com/oj150
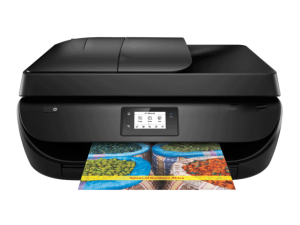
Overview
HP Officejet 150 printer supports office oriented features like print, scan, copy and fax.
123.hp.com/setup 150, Printer setup & install
Setting up HP Officejet 150 printer for the first time
1. Unbox the Officejet 150 printer
To start with, Remove all the packing materials and tape from the printer. Now, Hold the handles on each side of the printer and raise the door of the ink cartridge until it clicks into its place. Remove all the packing materials from the interior of the printer. Finally, Remove tape from the input tray door and then close it back.
2. Connect the power cord to the printer
Do not connect the USB cable at this point. Then, connect one end of the power cord to the printer device and the other end to the power source. Now, turn on the printer and set the preferences using the panel control.
3. Load the printing paper
Firstly, Open the input tray door and pull open the paper tray. Slide the paper width guides open. Now, insert paper into the paper tray with print side down. Then, Push the paper till the end, slide the paper width guides i.Push the input tray back till it clicks in place.
4. Install ink cartridges
Firstly, Raise the ink cartridge access door and wait until the device gets idle and silent. Now, Remove the plastic tape on the ink cartridges. Then, Lift up the lid and install the ink cartridges. Hold the ink cartridge one by one with nozzles towards the printer and then push them to snap in its place. Close the lid on the ink cartridge slot and close the access door. Wait for a while, The printer automatically prints out an alignment page.
5. Align page
Aligning ink cartridges gives you best print quality. Now, Place the printed alignment page in the scanner glass and close the lid. Then, touch OK on the control panel to start the process. After a while, The printer device automatically prints out an alignment page.
6. Install HP Officejet 150 printer software
Once the above steps to for the oj 150 hardware setup is over, you can install the printer software from 123.hp.com/oj150 . During the HP Officejet 150 printer software installation, the printing software instructs you when to connect the printer to your computer. But, Do not connect until you are prompted to.
HP Officejet 150 Software setup from 123.hp.com/oj150
Once the hardware setup is successfully completed, you can go for the 123 HP Officejet 150 Software Setup. For this, you need to install the HP Officejet 150 printer driver software from the CD provided with the printer. While, you can download the latest printer driver from 123.hp.com/oj150 or 123.hp.com/setup 150
Opening the HP Officejet 150 Printer Software in Windows
After installing the printer software from 123.hp.com/setup 150 , open the software as follows:
In Windows 8 computer, Right click in an empty area of the start screen, choose All apps on the apps menu. Now, select your printer name.
If you have a Windows 7, Windows Vista or Windows XP Computer, Click start from the desktop. Then, click All Programs -> HP. Now, Choose the printer folder and then choose the icon with the printer name.
HP Officejet 150 Web services
HP Officejet 150 ePrint
- HP ePrint is a service from HP.
- Generally, It assigns a unique email id to your printer device.
- Using this email id, you can print to your eprint enabled printer from any location, anytime.
- For this you need to enable Web Services on the printer
- However, You have to sign up for a HP Connected account.
HP Officejet 150 Printables

- HP Printables is another free service from HP
- It allows you to find and print preformatted web content directly from your printer.
- You can also store documents on the web after scanning.
Then, It has a wide range of content like store coupons, photos, news, worksheets for kids etc.
HP Officejet 150 Web services Setup
Your HP Officejet 150 printer should be connected to the internet using wireless connection, before connecting to the HP Web Services.
There are different methods to connect to setup Web Services.
Setup Web Services using Officejet 150 printer control panel
From the control panel of the printer ,choose HP Printables.
After that, Choose Enable Web Services.
Now, Accept the Web Services terms of use.
Choose Yes in the Auto Update screen to let the printer to automatically check for and install product updates if any.
If a printer update is available, HP Officejet 150 printer downloads and installs the update and restarts.
Now, you have to do the setup again, by repeating the above steps.
Once it is successfully connected to the server, an information page is printed. Follow the steps printed on this page to finish the setup.
Set up Web Services using HP Officejet 150 Embedded Web Server (EWS)
Open the embedded Web server by typing the IP address or hostname assigned to the printer
Go to Web Services tab.
In the Web Services Settings choose Setup -> Continue, and follow the on-screen instructions to accept the terms of use.
Install printer updates if any.
Once it is successfully connected to the server, an information page is printed. Follow the steps printed on this page to finish the setup.
Setup Web Services using the HP Officejet 150 printer software in Windows
Firstly, Download the HP Officejet 150 printer software from the Manufacturer’s site 123.hp.com/oj150 .
In the window that appears, double-click Print, Scan & Fax
Then, Select Connect Printer to the Web option in Print.
The printer’s home page (embedded web server) opens.
Go to Web Services tab.
In the Web Services Settings , choose Setup-> Continue and follow the on-screen instructions to accept the terms of use.
Now, Install printer updates if needed.
Finally, your software prints out an information page. Follow the steps printed on this page to finish the setup.